Visual Studio
Visual Studio is a Windows-only IDE created by Microsoft. Visual Studio should not be confused with Visual Studio Code. Microsoft provides a Visual Studio Community edition that is free for open-source contributors and individuals. As Rebel Engine is an open source project, Visual Studio can be used for free to contribute to Rebel Engine.
Install Workloads
When running Visual Studio Installer, include the Desktop development with C++ workload.
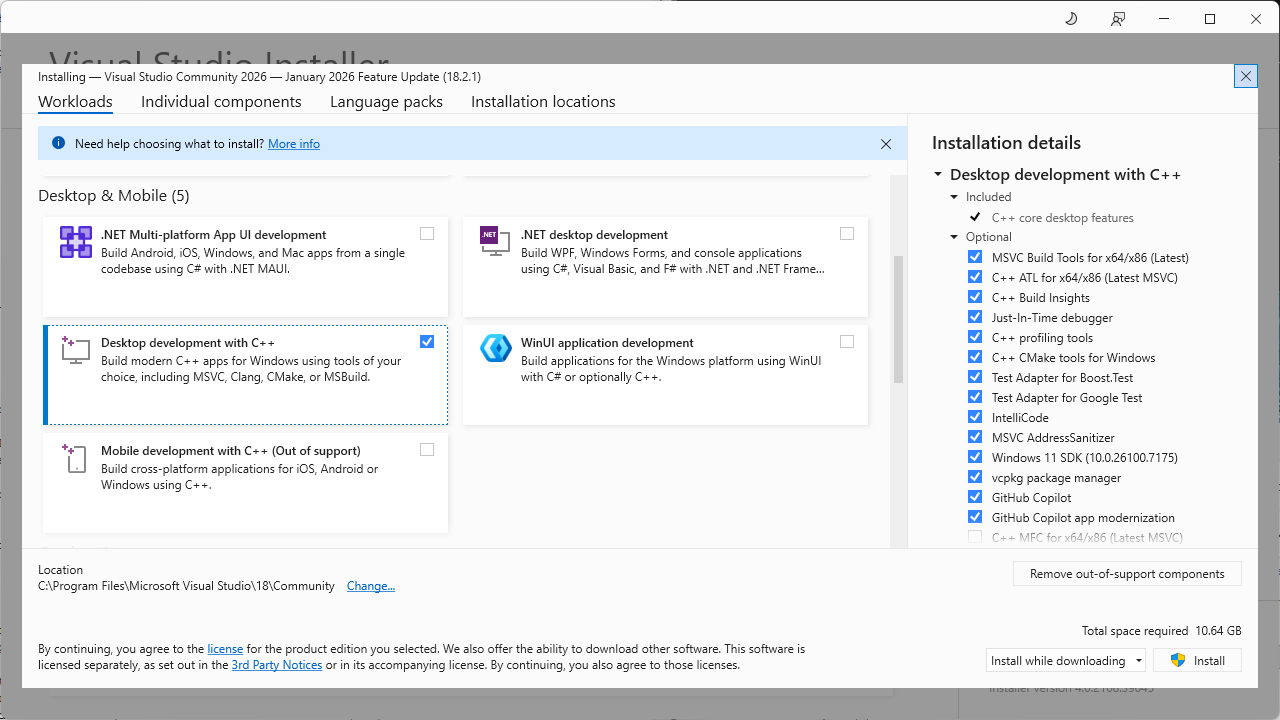
Install Desktip development with C++
Visual Studio can also be used to do cross-platform development. When running Visual Studio Installer, include the Linux, Mac, and embedded development with C++ toolset.
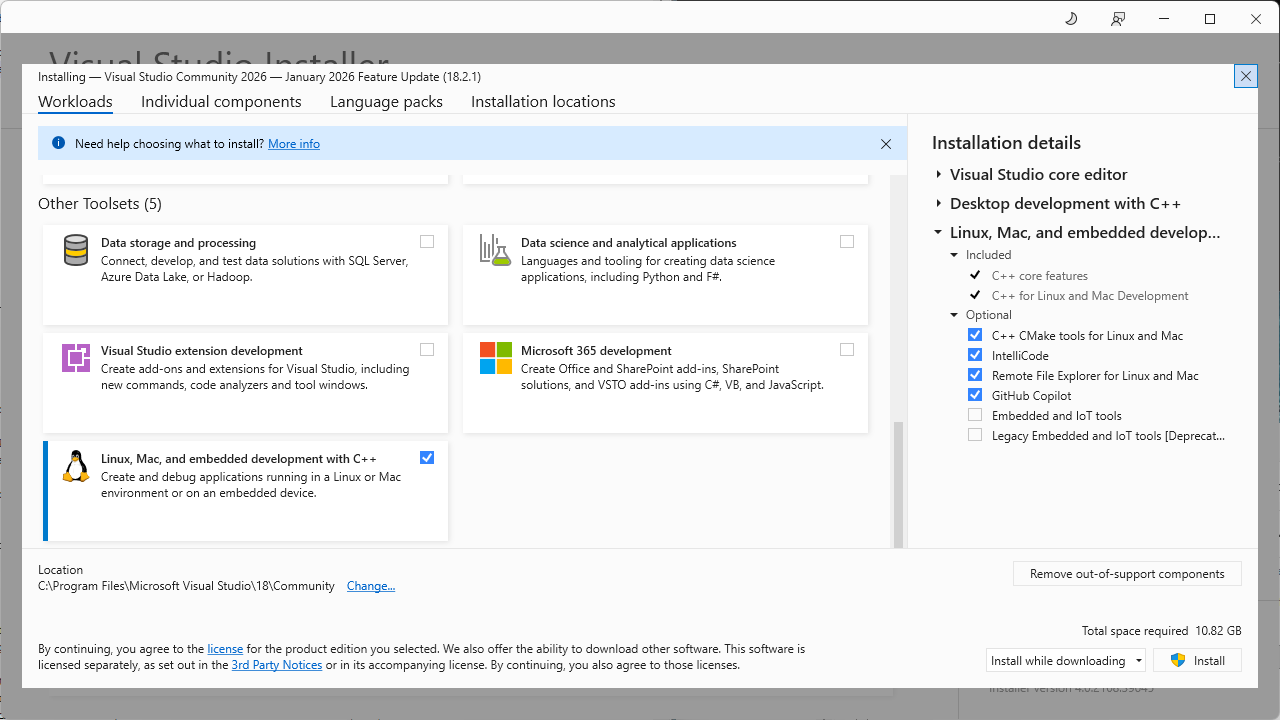
Linux, Mac, and embedded development with C++
These can also be installed or removed later through the Visual Studio Installer application.
Create a Visual Studio project
Rebel Engine is compiled using SCons. The SCons build file includes an option to create the required Visual Studio project file. From the command line enter:
scons -j2 vsproj=yes
The number after the j specifies the number of threads SCons should use.
The value specified here will be used to specify the number of threads to use when building Rebel Engine in Visual Studio later.
If you want to change the number of threads used by Visual Studio to build Rebel Engine,
simply re-run this command again with a new value after j.
As improvements are made to Rebel Engine, files and folders are added, removed and renamed. Visual Studio does not automatically update the files and folders; unless you are personally making the changes. Whenever you want to update the project's files and folders, simply, re-run this command again.
Open Rebel Engine solution
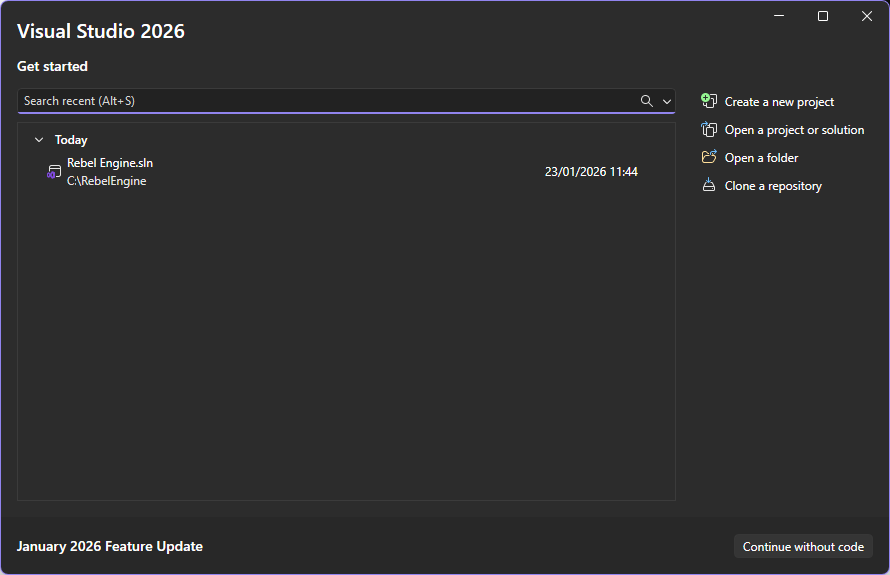
At the Visual Studio start screen, select Open a project or solution.

Open a project or solution
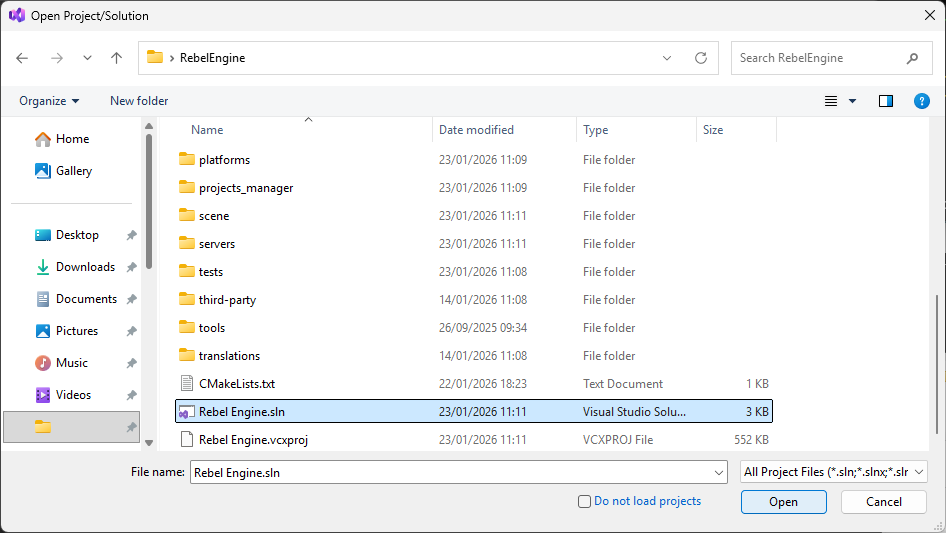
Browse to the Rebel Engine root folder, and select the RebelEngine.sln.
If you don't find the Rebel Engine.sln file in the Rebel Engine root folder,
see Create a Visual Studio project for creating a Visual Studio project.
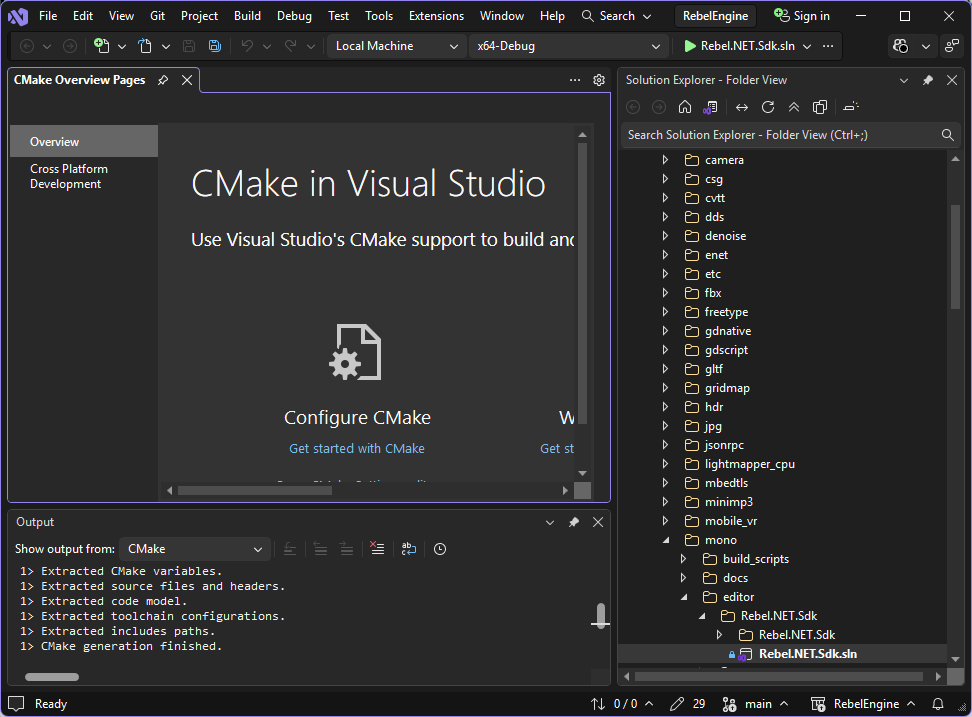
Open Rebel Engine.sln
You can now start contributing to Rebel Engine using Visual Studio and the Microsoft Visual Studio C and C++ compiler (MSVC).
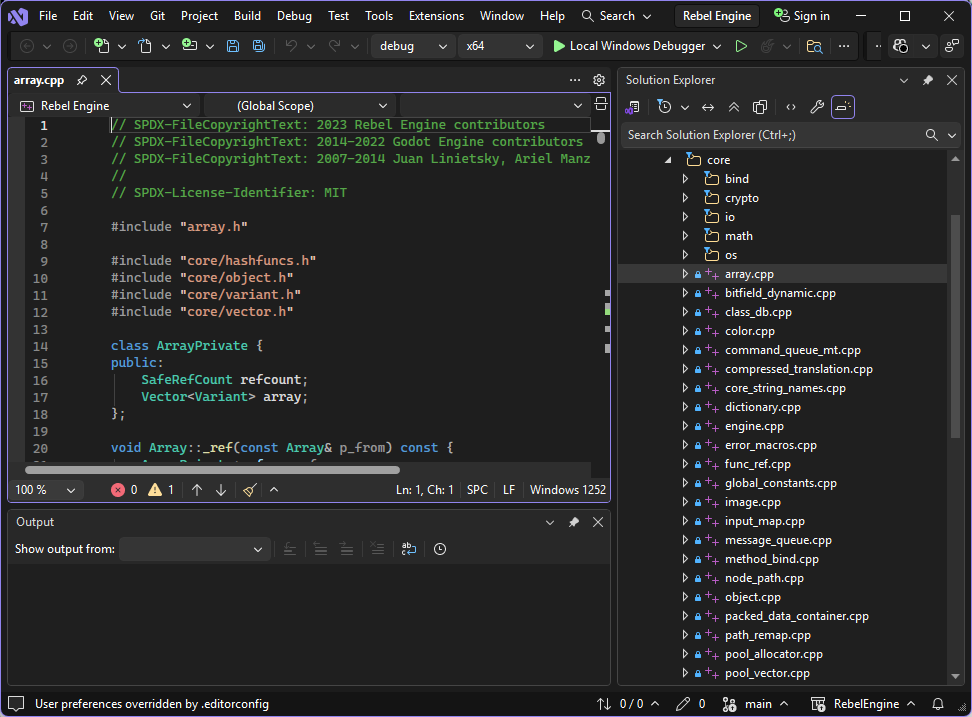
Visual Studio Rebel Engine Solution
Note: The Rebel Engine solution file includes multiple configurations. These configurations can be used to build and debug Rebel Engine in Visual Studio using MSVC, but they can't be used to modify the build options. To configure Visual Studio to support other build options, we need to manually define the build configurations. This is covered below.
Open Rebel Engine folder
Using Visual Studio with the Rebel Engine solution file is limited to basic building and debugging. For more advanced building and debugging we need to import Rebel Engine as a folder. We can then define the configurations manually; including specifying the desired build options.
At the Visual Studio start screen, select Open a folder.
Open a folder
Browse to and open the Rebel Engine root folder.
Visual Studio Rebel Engine folder
Note: Rebel Engine includes a Basic CMakeLists.txt file.
Visual Studio will detect this file and assume that Rebel Engine is compiled using CMake.
However, Rebel Engine does not use CMake.
Rebel Engine is compiled using SCons.
Visual Studio will also detect the Rebel.NET.Sdk.sln solution file.
We do not want to use this either.
Create custom Rebel Engine build tasks
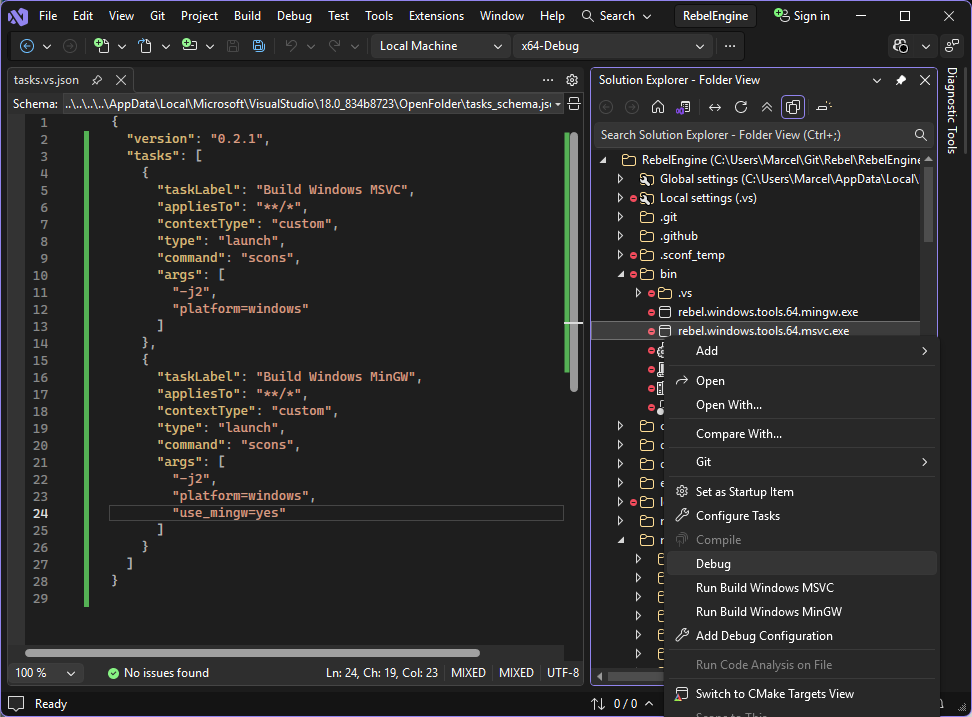
Open Rebel Engine folder. In Solution Explorer, right-click on any folder or file and select Configure Tasks.
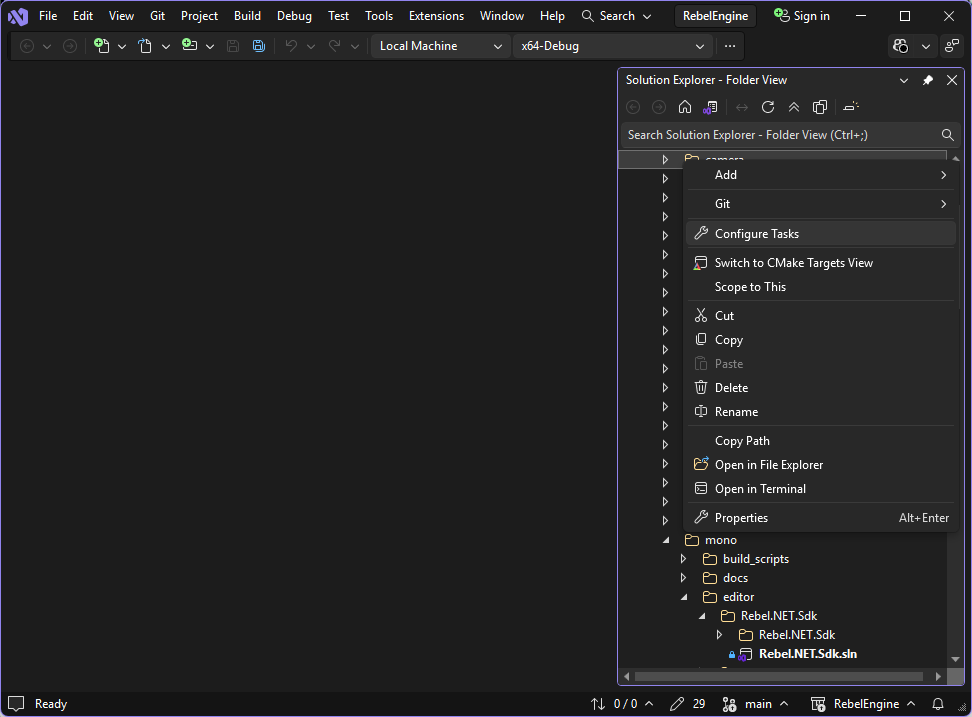
Right-click on a file or folder and select Configure Tasks
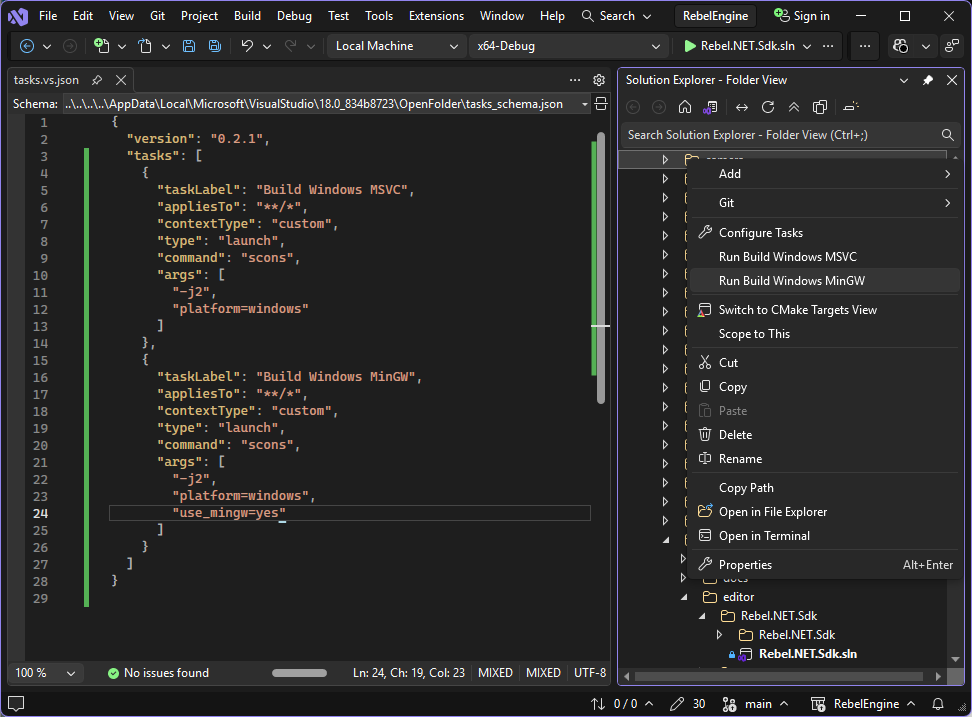
This will create a tasks.vs.json file in the .vs folder.
Here you can create your build tasks.
For each task, define the following task fields:
taskLabel: This can be anything that helps you identify the build variant.
appliesTo:
"**/*"contextType:
customtype:
launchcommand:
sconsargs: An array containing the build arguments.
You can create as many build tasks as desired.
For details on Rebel Engine build options using SCons, see Introduction to the buildsystem.
For more information on the tasks.vs.json schema, see https://learn.microsoft.com/en-us/cpp/build/tasks-vs-json-schema-reference-cpp.
Save the tasks.vs.json file.
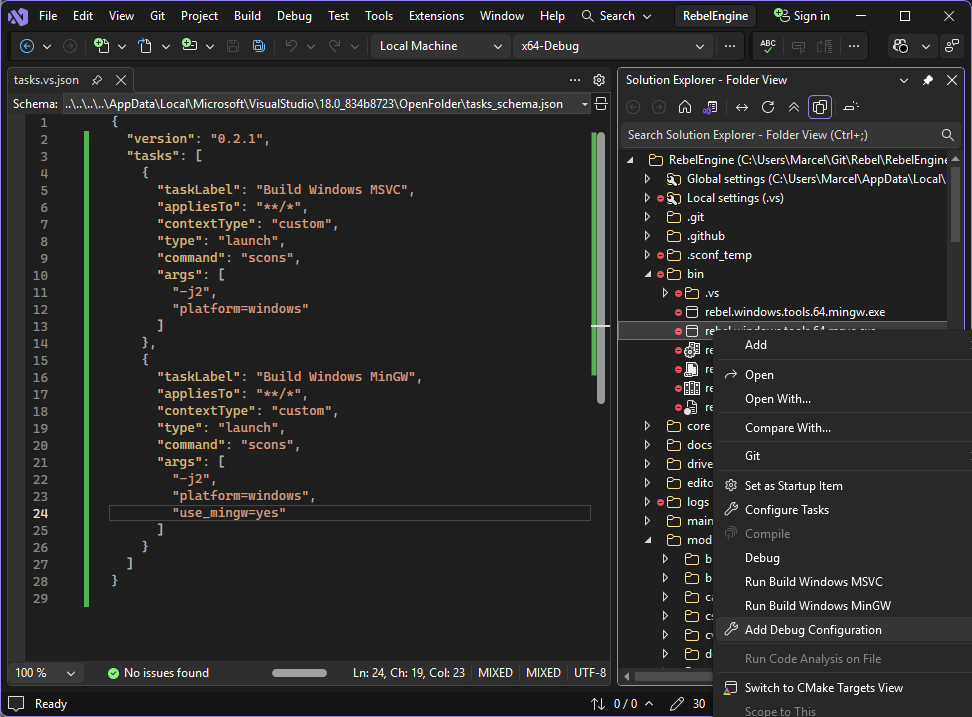
Now, when you right-click on any file or folder in the Solution Explorer,
your tasks will be listed as Run options under Configure Tasks.
Create and run build tasks
You can now build Rebel Engine with any of the build options.
Run and debug Rebel Engine
If you're using the Rebel Engine solution file, run and debug configurations will be pre-configured. Run and debug Rebel Engine like any other Visual Studio project.
If you're using the Rebel Engine folder, you need to find the executable created by your custom build task. By default, Solution Explorer doesn't show all files; so click the Show All Files icon.

Show all files
Browse to the Rebel Engine bin folder, and find the executable that your custom build task created.
If you used the default MSVC compiler,
the executable will have the msvc.exe suffix.
Simply, right-click on the executable, and select Debug.
This will start the Visual Studio debugger.
For more information on the Visual Studio debugger, see https://learn.microsoft.com/en-us/visualstudio/debugger/debugger-feature-tour.
Show all files
If you used a different compiler, you need to create a custom launch debug configuration.
For example, if you used the use_mingw=yes build option,
Rebel Engine will be built with the GCC Compiler,
and the executable will have the mingw.exe suffix.
Right-click on the executable and select Add Debug Configuration.
Add Debug Configuration
The required debugger depends on the compiler used to build Rebel Engine.
For example, if you used the use_mingw=yes build option,
the created executable can be debugged with the GDB debugger.
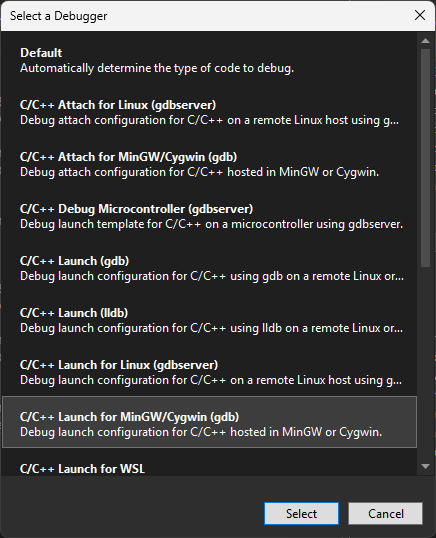
Create Debug launch configuration
Note: Visual Studio can also be used to cross-compile for Linux using a remote Linux environment, or the Windows Subsystem for Linux. There are options to create debugger launch configurations for these builds too. For more information, see Linux development with C++.
Select your required debugger, and click Select.
This will create a launch.vs.json file in the .vs folder.
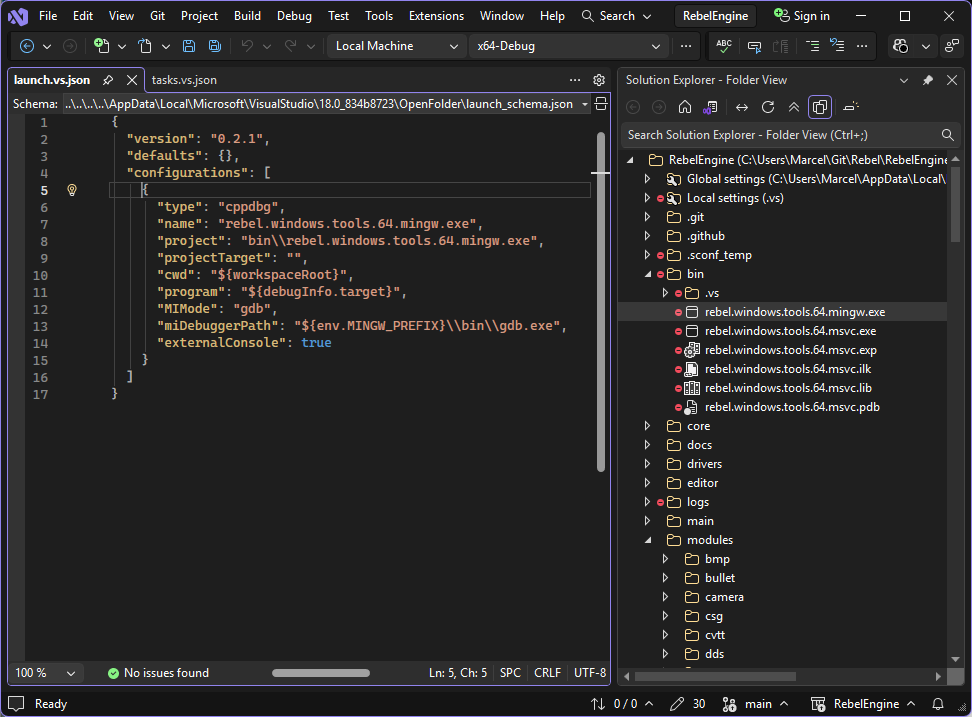
launch.vs.json
If you selected the correct debugger for the executable, there should be no need to change anything.
For more information on the launch.vs.json schema, see https://learn.microsoft.com/en-us/cpp/build/launch-vs-schema-reference-cpp
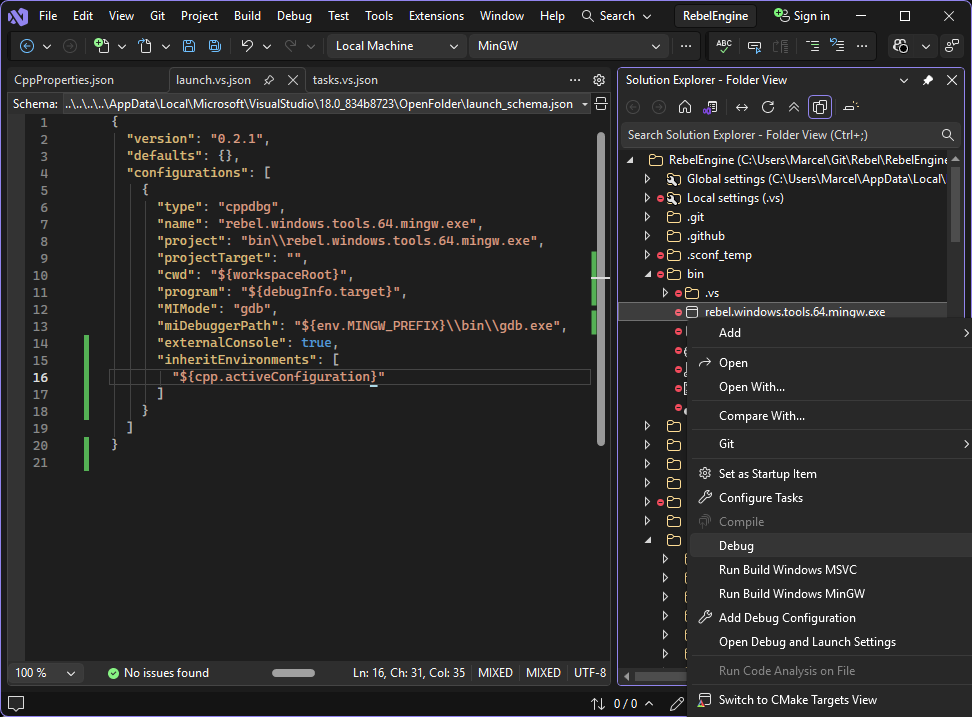
You should now be able to right-click on the mingw.exe executable and select Debug to run and debug Rebel Engine.
Debug MinGW Rebel Engine
Note: If the MINGW_PREFIX environmental variable is not defined,
Visual Studio will not find your GDB executable.
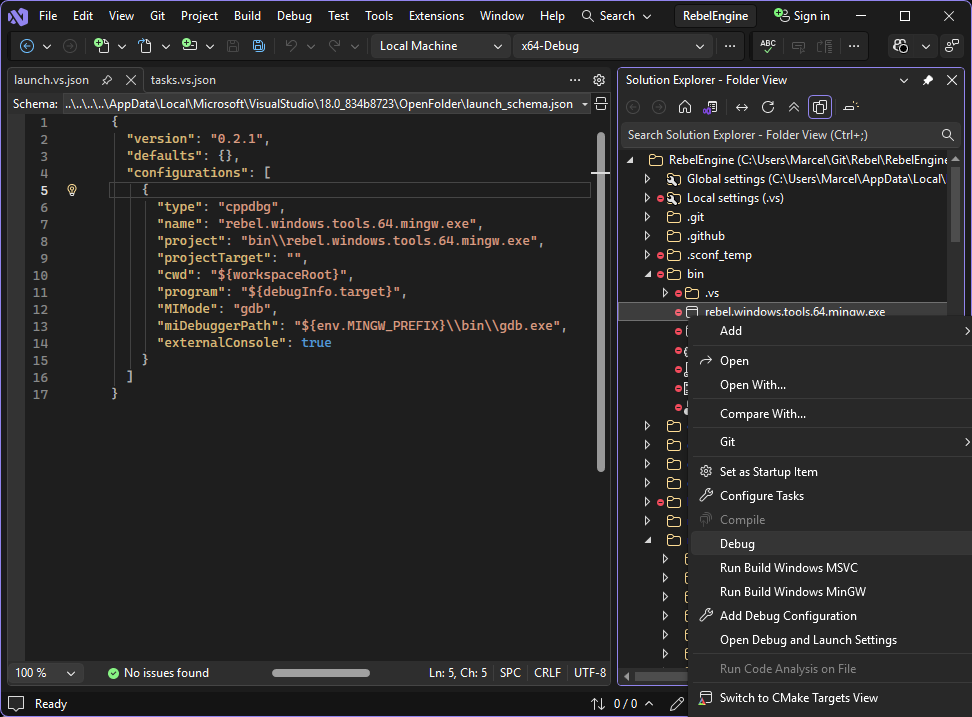
Unable to start debugging
Visual Studio will be unable to start debugging if the value of miDebuggerPath is invalid.
If GDB is in your path, you can simply remove the ${env.MINGW_PREFIX}\\bin\\ from the miDebuggerPath variable.
Alternatively, you can define the MINGW_PREFIX environment variable in a project configuration file.
Create a project configuration file
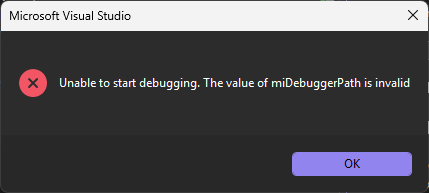
If one doesn't exist, create a CppProperties.json file in the Rebel Engine root folder.
Here you can store one or more project configurations.
For each configuration, define the following fields:
name: The name you want to appear in the configuration drop down list.
intelliSenseMode: Select the desired architecture-specific variant.
includePath: An array of include paths. Add
.to support code lookups.environments: An array of variables that can be accessed with
${env.VARIABLE}.
For more information on the CppProperties.json schema, see https://learn.microsoft.com/en-us/cpp/build/cppproperties-schema-reference
For example, add the MINGW_PREFIX environment variable to the environments array.
Set the value to the root folder of your MinGW-64 installation.
GDB should be in the bin folder of this path.
Also, remember to use a double \\ for each \ in the path.
CppProperties.json
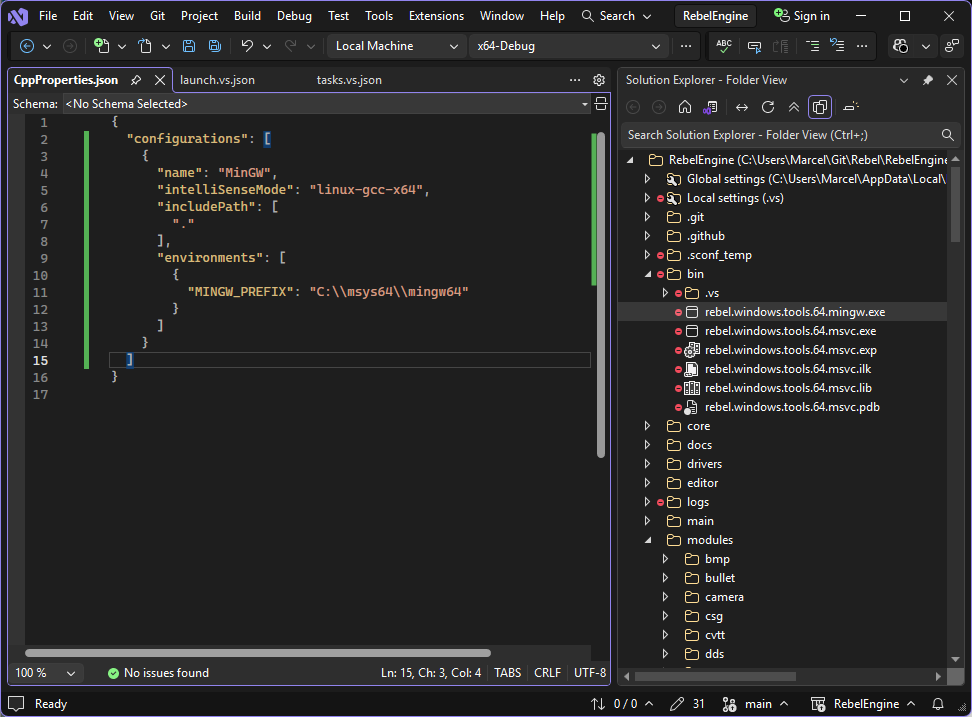
In the configuration drop down list, select your new configuration.
Select configuration
Finally, we need to tell our launch configuration to inherit the active configuration environment.
In the launch.vs.json file, add the inheritEnvironments field to the configuration.
The inheritEnvironments field is an array of values.
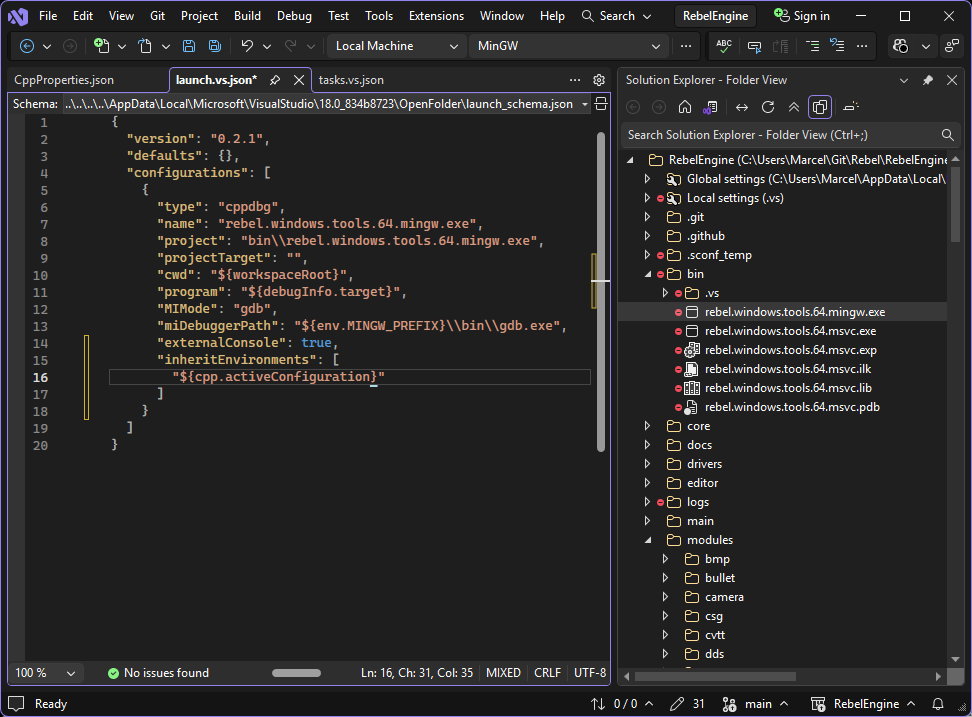
Add the value ${cpp.activeConfiguration}.
Select configuration
You should now be able to right-click on the mingw.exe executable and select Debug to run and debug Rebel Engine.
Debug MinGW Rebel Engine
That's it! You're now ready to start contributing to Rebel Engine using Visual Studio.